Monday, November 30, 2009

EIO - Monday Feature!

Hello Everyone~

I am recovering after my craft show yesterday. The last one of the season for me....now it's time to work on my Christmas cards and gifts! :)

Today it's my turn to pick a product to feature for Embellish.....and my choice is BASIC GREY! From now until next Monday you can save 10% on all Basic Grey products! Click on the link in my sidebar to head over to the Embellish Store! :) Make sure to tell Barb I sent you!

Today I have a couple candles that I altered with Basic Grey products to share with you! The first is using the Eskimo Kisses paper pack....these papers don't have to be christmasy....they can be used for summer too!

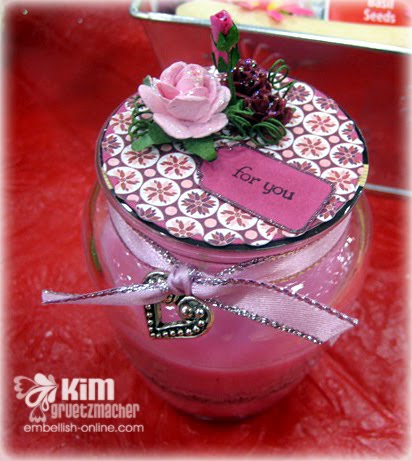
I've also used a Sugared Rub On to decorate the glass part of the candle.
The second candle I am sharing with you is also using the Eskimo Kisses line, again showcasing that you can use this for a summer setting.
Then I have stamped a butterfly on the glass for decoration.
I hope you have enjoyed these two altered items! I'm off studying for an exam I have tomorrow! I REALLY can't wait until Dec. 17th when I will be DONE with exams for a while!

Don't forget to head over to Embellish to check out all the amazing offers Barb has for you!

Recipe:
Stamps: Butterfly stamp from my stash
Inks:
Stazon On in white, Black Spica,
Papers: Basic Grey Eskimo Kisses Collection
Tools:
Spellbinders Circle and Scallop Circle Nesties, MS butterfly punches, MS tag punch, EK Success leaf punch
Embellishments: Diamond Stickles, Basic Grey Sugared Rub On, Charms & Ribbon from my stash


Thanks for stopping by!
Photobucket

Sunday, November 29, 2009

Candy for a Cause Winners!

First off I want to say a huge THANK YOU to everyone who sent cards for the Anderson Family! I want to let you know that I will be planning a date to meet Sarah for lunch and hand deliver all of your beautiful cards to her.

The stamping community is so kind and generous and I am so glad to be a part of this "family!" After receiving so many generous donations, I decided to break the candy into 5 so that more people could win new fun goodies.

THE WINNERS ARE:
*
*
*
*


PRIZE 1:
Items donated by Me, goes to April!


*
*
*

PRIZE 2:

WOJ Willow Stamp donated by Katharina; and
$20 Gift Certificate donated by Tab of 7 Kids College Fund
goes to Melissa!


*

*
*

PRIZE 3:
Christmas ribbon, a 6x6 Basic Grey NEW Nook & Pantry Paper Pack, and American Craft Glitter Thickers donated by Dani
goes to Mary Lou!

*
*
*
PRIZE 4:
SU products donated by Lorie; and
Ribbon donated by Virginia
goes to Andrea!

*
*
*
PRIZE 5:
All My Memories Desktop Tote donated by Betty; and
Recollections Christmas Clear Stamp Set donated by Piali
goes to Ria!

If all the winners could please email me your mailing address I will get your prizes to you shortly! Thanks again!

Photobucket

Friday, November 27, 2009

InStyle Bauble Ornaments Blog Hop!

It's the last Friday of the month so you know what that means....it's time for another InStyle Stamps Blog Hop!!! If you're here from Piali's blog you are in the correct spot! If not, click HERE to start at the beginning on the hop!
Today we are
Showcasing Ornaments
InStyle!


Welcome to the InStyle Stamps November Blog Hop!


I hope you all have full bellies from yesterday and got to spend time with your families and friends! Speaking of friends, we have a few more divas joining the InStyle Team and I am thankful to be on a team with all this amazing talent! Please take time along the hop to WELCOME all our new divas!

This months blog hop is show casing some of the new holiday stamps over at InStyle Stamps and we are showing you how you can create your own ornaments with all these cuties! Today I have a whole family of ornaments to share with you!

Like usual, you get to decide which DT member inspires you the most! After you go and view all of the other DT's projects make sure you head on over to the InStyle Stamps Blog to vote for your favorite project! The DT member who gets the most votes will win a prize....AND YOU CAN WIN A PRIZE JUST FOR VOTING!!! All you have to do is place your vote; then leave a comment on the post with the poll before 11:59pm EST on Saturday, November 28, and winners will be announced on Sunday.

First I have used our newbie Kimi (who will be released later today)! Isn't she a cutie...I knew I had to play with her especially when I saw her name was mine! :) I love this little angel so much that I had to make two ornaments with her! First is a glass ornament. I printed Kimi on acetate paper, colored her with Copics and Stickles. Added some snow to my ornament, rolled Kimi up and put her inside the ornament and decorated with some ribbon, jingle bells and an angel charm.
Here's a close up of Kimi the cutie pie!

Now for the 2nd Kimi ornament. This is how the ornament looked when I bought it. Just a plain ceramic ornament ready to be decorated.
After some Extreme Glitter in Gold and a cute Kimi this is what I came up with! I am very pleased with the end result.
A close up so you can see Miss. Kimi who of course what colored with Copics and Spicas!
Here is a close up so you can see the Stickles used on Kimi's wings and on the edge of the flowers. I put the flowers together to make it look like Kimi is floating on a cloud.
Next we have Sandy! I love this little cutie too! There are so many new fun holiday images at ISS you HAVE to go and check them out! Sandy was colored with Copics and I added liquid applique to make the trim on her dress and hat pop.
You have to love your Copics to pieces! They even allow you to change the color of your charms. If you look close I have colored the tree charm green. You can alter anything with Copics!
Finally, is Snowman Chick! She's so adorable building her snowman. I was a little impatient and kind of smeared the printer ink on this one.....but a FAST FIX is to grab your Copic Multiliner and you can fix any smeared line that you may have! Such a life saver! If you don't have a multiliner you really need to get one!!!

Thanks for stopping by and seeing my ornaments, I hope you enjoyed them and they inspire you to go and create! Your next stop is Janelle's blog!

AND....Don't forget to go vote for your favorite DT member's project over at the InStyle Blog!

Hope you are having a GREAT Friday and those of you BLACK FRIDAY shopping I give you lots of credit....I can't stand waiting in line so I'm shopping online!

If you wish to purchase any ISS stamps, use code: ISSDTKG
during check out to receive 5% off your total order! Happy Shopping!

Thanks for stopping by!
Kimi Gold Ornament Recipe:
Stamps: Kimi diggie (who will be released later today) by InStyle Stamps ,

Inks:
Copics Spicas, Copics
Copics Colors Used: R02, R11, R81, R83, R85, YR21, YR24, E00, E21, E99, YR00, W1, B000, B14, B18, Clear Spica
Papers: Neenah Smooth Classic Crest,
Tools:
Paint Brush

Embellishments: Extreme Glitter - Gold; Bride's Flowers, Stickles in Star Dust & Fruit Punch, and ribbon from my stash

Kimi Glass Ornament Recipe:

Stamps: Kimi diggie
(who will be released later today) by InStyle Stamps InStyle Stamps ,
Inks: Copics
Copics Colors Used: BG05, E13, E21, E57. E59
Papers: Acetate
Tools: Bow Easy
Embellishments: Glamour Dust, crystal fine glitter, Stickles in Turquoise and Diamond, Snickerdoodle Smooch, angel charm, jingle bells, ribbon from my stash

Sandy Glass Ornament Recipe:
Stamps: Sandy diggie by InStyle Stamps ,

Inks:
Copics
Copics Colors Used: R24, R29, G24, G28, B16, E13, E21, E59, E99
Papers: Acetate
Tools:
Bow Easy

Embellishments: MS Crystal Coarse glitter, MS mica flake snow, Liquid Applique, Snickerdoodle Smooch, Diamond Stickles, Christmas Tree Charm, Jingle Bells and ribbon from my stash.

Snowman Chick Glass Ornament Recipe:

Stamps: Snowman Chick diggie by InStyle Stamps
Inks: Copics
Copics Colors Used: B16, V04, V06, R14, N3, N5, N7, E13, E21, E99, YR 24
Papers: Acetate
Tools:
Bow Easy

Embellishments: MS Carrara Marble Coarse glitter, Moonlight and Siren Smooch, Polar White Flower Soft, Snowflake charm, ribbon from my stash


Photobucket

Thursday, November 26, 2009

Happy Thanksgiving

Wishing Everyone who celebrate Thanksgiving today a very
HAPPY
THANKSGIVING!

I hope you all get to spend the day with your family and friends! And for those who are overseas in the military, may our thoughts and prayers be with them as they are away from their loved ones.

I'm off to my in-laws for some yummy food!

Thanks for stopping by!

Photobucket

Wednesday, November 25, 2009

Blog Candy for a Cause

** This will remain on the top of my blog until Nov. 25th, please scroll down for new posts**

I'm sure many of you know Sarah (AKA Scrampin' Mama or Sairabee on SCS)! She's going through a VERY difficult time right now, as her 3 year old son, Henry just passed away after a brief viral illness. I am asking you all to keep Sarah and her family in your thoughts and prayers.

Here's a picture of Henry the little cutie pie:
I am so heart broken for the Anderson family. I would LOVE to shower Sarah and her family with cards to show our love and support, so I am going to offer up some candy to all who participate in my challenge.

My Candy Includes:
* 12 x 12 Glazed Christmas Bazzill Paper Pack
* Assorted Flowers
* Hat Pins
* Assorted Mixed of Charms
* Pack of Making Memories Shimmer Flourish Chipboard Pieces

What you need to do:
1. Create a card for Sarah and her family
2. Post your card on your blog with a message about my challenge/candy
3. Come back to this post and leave me a link to your creation
4. Mail your card to me before November 25th at:

Kim Gruetzmacher
PO Box 223
Suring, WI 54174

I will take care of sending all the cards to Sarah in one bundle! On November 26th I will draw a winner. Thanks for your help in showering our good friend with lots of love!

Edited to add and THANK all the FABULOUS people helping and donating prizes:

* Virginia from InStyle Stamps has graciously offered to add 10 yards of May Arts Ribbon to my candy! Thanks so much hun!

* Lorie has graciously donated some retired SU goodies!

* Dani is adding some christmas ribbon, a 6x6 Basic Grey NEW Nook & Pantry Paper Pack, and American Craft Glitter Thickers.

* Katharina of Whiff of Joy has so kindly donating a Willow with Gingerbread Heart stamp! * Betty has added a brand new All My Memories Desktop Tote.

* Piali, my InStyle Stamps DT Diva teammate has also added to this cause! She is donating a Recollections Christmas Clear Stamp Set.

* Tab, from 7 Kids College Fund, has so graciously donated at $20 gift certificate to her store!

I thank everyone from the bottom of my heart who is ad
ding to this cause! You all are such wonderful, kind, and giving people. Everyone helping out is an angel!!!

Sending all my love to you and your family Sarah!


Photobucket

Tuesday, November 24, 2009

My Craft Room MAKE-OVER!

Hello~ Happy Tuesday! Today I am taking 2 exams! ICK! I'd much rather be crafting...but today is my only day at school this week so I can't complain at all!

I hope everyone is ready to FINALLY see my craft room all MADE-OVER!!! However, to fully understand how excited I was about this transformation first I have to share some "before" pictures. I am embarassed to share the before pictures...and even to think that I actually was able to create anything in that disaster is beyond me!

So here are the before pictures *as I go red with embarrassment*

As you can see my hubby's bowflex was in our extra bedroom. Living in a small 2 bedroom apartment there is NO room for a bowflex....so after 5 years of me and my mom asking/telling hubby the bowflex needs to be moved he said ok. I no longer have a clothes hanger (as I hung lots of clothes on the bowflex)....but that is PERFECTLY fine by me as I have an organized and fuctional craft room now! :)

Before the make-over, I stashed as much of my supplies under the bowflex, as I had no room for storage containers. I used baskets that would fit under the bowflex, but they soon got over full. When I created, I never could find what it was that I needed because everything was buried.
My desk was attrocious! I had about a 12x12 inch space to create on and most of the time I just used my scor-pal on my lap instead because it was easier! All of my newer items always ended up on my desk so I could *somewhat* find them.
AND NOW FOR THE MIRACLE:
The new craft room! Doesn't it look WAY better without the bowflex in there! Yes, there is even carpet! Hubby and I laughed as we were like wow there is carpet in here.....who knew! You couldn't see it before. LOL!
And the desk is now workable! LOTS of space to create! I still find myself using my lap and have to yell at myself to use the desk!
Here you can see my Copic home. The gray box on the left houses my Twinkling H2Os and Smooch. The black organizer on the right is home for my momento and versamark inks that I use all the time. As well as my stamp scrubber, Cuttlebug plates, Shimmerz Sprays, and other items I use frequently.
Here is my flower display! I took all of our DVDs off of the DVD rack and put them in totes for now, as hubby and I hardly ever watch movies. I thought the DVD racks were perfect to display my flowers....it's WAY easier to use them as I can see exactly which ones I would want to use for my project. I love having them in eyes view! The white totes on the left house my ribbon and some papers (some papers are also in crates under my desk, and in one tote next to my desk.) Can you tell I am a HUGE Jimmie Johnson fan? He's my boyfriend...lol! And boy what I SUPER EXCITED Sunday when he won the NASCAR Championship for the 4th time in a row making NASCAR History! YIPPY....Go Boyfriend!!!!
A close up of the paper and ribbon storage. Paper is on the right. Since I took the pictures I added another 3-drawer 12x12 storage rack. On the left is my ribbon. The ribbon is organized by color families. The bottom drawer is for white, black, brown, silver and gold. The middle drawer is red and pinks, and the top drawer is all other colors. The small gray organizer on top of my ribbon storage is the home for all my charms (I took this from hubby's gargage...it's a bolt and screw holder thing.) I still have to create labels for the drawers, but at least my charms are all together now. My Jamone Sew Mini is behind the charm house.
And finally is my catch all storage. Bottom drawer is home to my Basic Grey 6x6 pads, then is my tulle drawer, then the catch all drawer (which houses my pearls, brads, bling, rhinestones...all the extras). Next is my raffia drawer, and then my rubb-ons and dimensional foam tape are in the top of the bigger tower. One top of that tower is another 3 drawer tower which is home to my roses. In the pink bin is my glitter and snow embellies. The mini black tower is home to my flower soft, and sponges. The blue and green holder on the floor to the left is the home of all my ink pads and some wood block stamps.
It feels so good to *FINALLY* have my own space. I am so happy that my hubby helped me move the bowflex so that I can have my own room....all I share with now is hubby's desktop computer which is in a corner of the room, and of course the laundry baskets....but I can handle that! Before I couldn't wait until the day we could build our house so that I could have my own craft room....But now I'm no longer in a hurry.....I'm just happy to be organized!

A special thank you to my mom and dad for coming and helping! My mom was a HUGE help in helping me find homes for everything!

Thanks for stopping by!
Photobucket

Monday, November 23, 2009

EIO Notes

Hello to Everyone~

I hope you are all doing wonderful this fabulous Monday! :) Don't forget to check out my Blog Candy for a Cause HERE! Today it's my weekly post for Embellish and I have a fun notepad to share with you! I found the dimensions HERE. Jackie did an amazing job with her notepad that I just had to try to make one, and I have to say it's so easy! I tweeked a few things, that I will share with you while you are here!

I used one of my new WOJ stamps....this is one of the new Gnomes by Norma Fickle called Uru with Candycane. I am in love with the cute Gnomes so you will get to see many more! I have used numerous papers from the Imaginisce Polar Expression Collection. The "notes" is the new delight Thickers, they are fabric covered and I adore them. The size is perfect for cardmakers because they are smaller than the regular Thickers.

Here is a close up of Miss. Uru colored with Copics. I have cut and embossed the image with my Curved Rectangle Nesties. My border design was created with Rubber Tapestry Pine Forest stamps. I love how you can create your own unique borders with these small stamps. To make Uru's candycane sparkle I have used my clear Spica Copic on the red parts and frosted lace Stickles on the white parts. I have accented the image with my white gel pen.

I created a twinkling snowflake for the bottom corner of the notepad. Created with my Snowflake Nesties, and then added Twinklets for the crystal sparkles!
Then we have the inside with my notepad. Again I used my Snowflake Nesties along with a Imaginisce Cozy Sticker Stacker for the accent on the left hand side of my holder. I covered the top of the notepad to match the papers that I have used on the front.
And then this is where I tweeked Jackie's tutorial a bit. So many customers at the craft shows I have been in have said they LOVE my altered notepads, however they are sad that when you use all of the paper you have to throw out the cute cover. Here I have created a fix to the problem. I have created a pocket that you slide the back cover of the notepad in so all you have to do is replace the notepad when you are done and can keep reusing the decorated cover. YAY!
Recipe:
Stamps: Uru with Candycane by WOJ, Tapestry Pine Forest Set
Inks:
Distress Ink in Fired Brick and Pine Needles, Momento Tuxedo Black, Clear Spica, Copics
Copic Colored Used: R02, R11, R43, R46, E00, E21, YG63, YG67, V93, V95, V99
Papers: Nennah Smooth Classic Crest, Imaginisce Polar Expressions Collection
Tools:
Scor-Pal, Tonic Cutter, Spellbinders Create A Flake 1 and Curved Rectangles Nesties, MS border punch,
Embellishments:
Twinklets Diamond Dust, Frosted Lace Stickles, Delight Thickers, Imaginisce Cozy Sticker Stackers,

Don't forget about Barb's AMAZING Specials this week and make sure to tell her that I sent you!

Get Free Shipping on domestic orders of $50.00 or more! Enter code 4SP9HD in the coupon box at checkout! (One discount per order)

New Frequent Buyer Club! For every $5.00 in purchases you'll receive 1 point. Collect 30 points and you'll receive a voucher for $15.00 off on your next purchase!

And this week's special selected by Eva is an additional 10% off Cuttlebug products.

Happy Shopping!
Thanks for stopping by!
Photobucket

Wednesday, November 18, 2009

Hi Friends~

I hope you are all doing well! Today I finished cleaning/setting up my new craft room! Woo-Hoo!!!! I can't wait to share my pictures with you all! This has been a dream come true to have my own space! Now I don't have to say I want a house (just so I can get a craft room) lol! I am content in the apartment (even though it's small) all because I have my room! hee hee!

Today I have a fun gift card holder to share with you! I've used Myron this super cute Elf over from InStyle Stamps. You can get 5% off of your order with using code ISSDTKG at your time of checkout. The gorgeous papers that I have used are from the American Crafts Merrymint Collection and you can get them at Embellish, just click on the link in my sidebar to go and shop!
Myron was colored with Copics of course! ;) And here's another view so you can see the cute gift card holder from another angle.
And here is the decorated inside.
Make sure you head on over to Embellish and check out all of the fun specials Barb has going on! And it's Eva's week to pick the special so from November 15th through the 22th you will receive 10% off all Cuttlebug products!! Happy Shopping!

Stamps: Myron from InStyle Stamps
Inks:
Copics,
Papers: Nennah Smooth Classic Crest, American Craft Merrymint collection
Tools:
Scor-Pal (to fold my cards), Tonic Cutter, MS Snowflake border punch,
Embellishments:
Velcroe


Now that my new craft room is all set up I can't wait to start playing so that I have more fun projects to share with you! :) I have a few gift items up my sleeve, so make sure you come back to see them!
Thanks for stopping by!

Photobucket

Monday, November 16, 2009

Barnyard Thank Yous

Hello Everyone~
I hope you are all doing wonderful! Things are pretty good here...I'm counting down the weeks to the semester....I will be so happy when it's Christmas Break....look out craft-time then! Sorry I've been missing the past week! My hubby totally surprised me this week and said that when I am on break of school we can move the bowflex out of our spare room and I can take over the area for my crafts! Woo-Hoo....well I COULDN'T wait for break and talked hubby into moving it this weekend so I have been busy re-organizing my craft space! I am so happy to have more room! I will definitely post pictures once I am done! My FABULOUS Mom came over and helped me yesterday....we had lots of fun....my Dad and hubby watched the NASCAR race...and YAY my driver won!

Don't forget to check out my
Blog Candy For A Cause! You still have time to enter!

Today I want to share some special Thank You cards that I have created. My parents' friend's farm burned down this summer. Thank goodness they only lost one cow in the fire, but their barn was a total loss. They are now in the process of rebuilding. My parents' friend asked me if I would make her some thank you cards....she wanted something "handmade" and "special" to sent to people who helped them out....I felt so honored that she asked me to make the cards for her. The only thing is wanted was something with a farm theme. And this is what I came up with:
I hand drew the barn, cut them out, ran them through my Cuttlebug with the Distressed Stripes embossing folder to give them a "barn" look. Then I matted them on cardstock and dp. I wanted to keep the layers simple and keep the whole card flat so that they could be mailed without extra postage. Although keeping them simple was definitely hard for me when I am used to always adding dimension to my cards! lol!
The flowers were punched with my Retro Flower punches, and my EK Success Leaf punch. The medium sized flowers were again run through my Cuttlebug with the Swiss Dots embossing folder. The cute cows were colored with my Copics and cut out with my Labels 4 nesties.I made 3 different designs, one in blue, one in brown, and one in red. I really like how they turned out. I hope that my parents' friend loves them too!
Recipe:
Stamps: Cow Stamp from my Grandma (I don't even know who makes it)
Inks: Copics; Momento Tuxedo Black
Papers: Nennah Smooth Classic Crest, DCWV dp; cardstock from my stash
Tools:
Scor-Pal (to fold my cards), Tonic Cutter, Spellbinders Labels 4 Nesties, Retro flower punches, EK Success Leaf punch, Distressed Stripes & Swiss Dots Cuttlebug embossing folders, SU window punch & label punch,
Embellishments:
n/a
Thanks so much for stopping by!

Photobucket

LinkWithin

Related Posts Plugin for WordPress, Blogger...